At home test kits are a convenient way to check your health and monitor your condition. They are easy to use and provide accurate results. However, following the instructions carefully is important to ensure your sample is collected correctly.
If you are using a DocHQ Health Check kit, we recommend that you watch our how-to video before taking your test. This video will walk you through the steps involved in taking your test and provide additional tips and advice.
Tips for at home blood collection
1. Be well-hydrated
Drink plenty of water for at least 2 hours before taking your test. This will help to ensure that your blood flows freely and that you are able to collect a sufficient sample.
2. Wash your hands thoroughly
Wash your hands with warm, soapy water for at least 20 seconds. This will help prevent contamination of your sample.
3. Warm up your hands
To warm up your hands, you can soak your non-dominant hand in warm water for 5 minutes. This will help dilate your blood vessels and make it easier to collect a blood sample.

Alternative ways to warm up your hand:
- Take a warm shower or bath
- Do some light exercise
- Hold a warm mug
4. Remain standing upright.
Ideally, you should remain standing for the whole process of taking your blood sample. This will help increase blood flow to your fingertip.
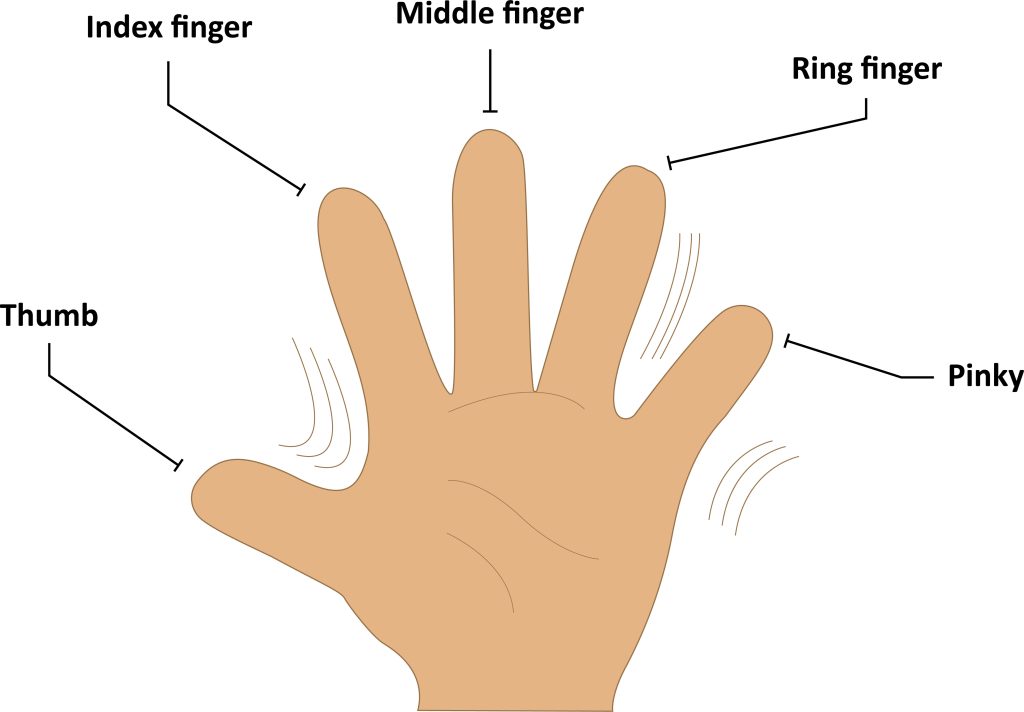
5. Use the side of your ring or little finger of your non-dominant hand
We recommend using the side of your ring finger or the little finger of your non-dominant hand. They have the best circulation and the greatest depth of tissue beneath the skin, hence offering the least chance of injury.
6. Press the top of your finger until it turns pink
Press the top of your finger with your thumb so that the tip of your finger turns pink.
7. Place the lancet at a right angle
Place the lancet at a right angle to the side of the fingertip and press firmly to activate.
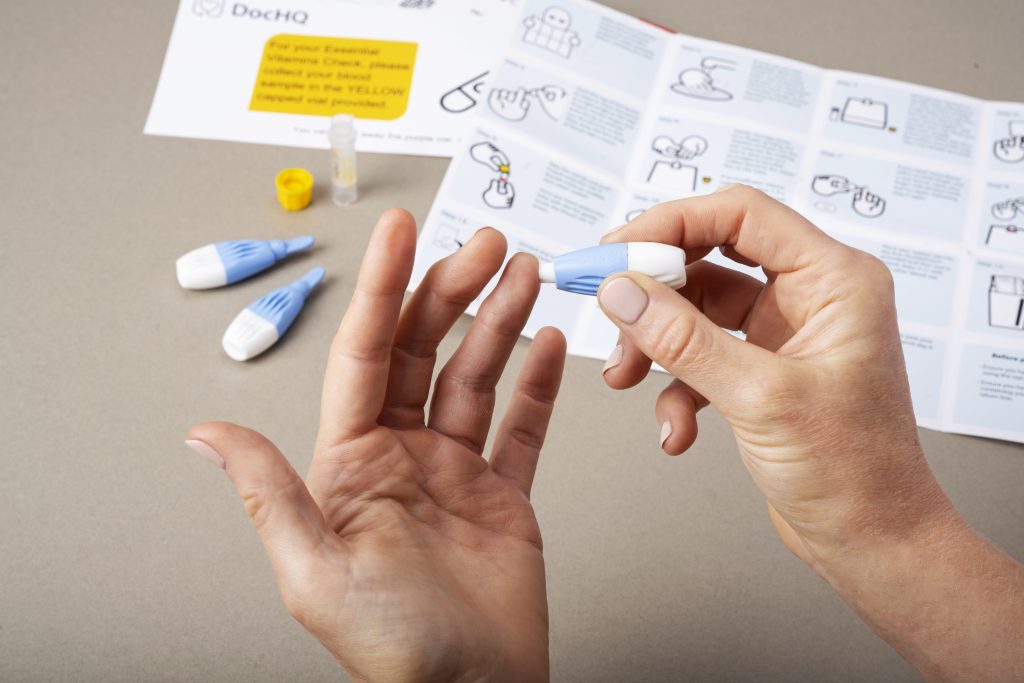
8. Gently massage your finger from the knuckle down to the tip
Wipe away the first drop of blood with a tissue. Gently massage your finger from the knuckle down to the tip, allowing the droplets of blood to fall into the vial. Do not squeeze your finger. It is essential that you fill the tube to the upper line.
9. Try a different finger if you are having troubles
If necessary, prick a different finger. If you need more blood, select another finger and repeat using a new lancet.
10. Apply plaster afterwards
Once you have collected enough blood, wipe away any excess blood on your finger using the cleansing wipe provided. Then, apply plaster to the prick site.
Additional tips:
- Stay clear of the fingertip. Prick the sides of your finger. The tips have more nerve endings.
- No squeezing. If a droplet doesn’t form, hold your hand below your waist for 5 seconds instead of squeezing the finger.
Conclusion
By following these tips, you can ensure that your at-home finger prick blood test is performed correctly and that your sample is collected accurately. This will help you get the most accurate results possible.